digest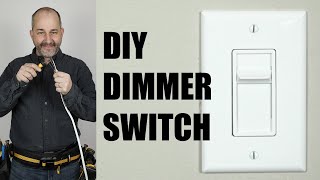
Short Summary
Main recommendation: Homeowners can install a dimmer switch themselves, provided they follow every step and use the proper tools, including a wire stripper with a gauge, square-end pliers, and a voltage tester. The video walks through removing the old switch, confirming the power is off, preparing and connecting the wires, and mounting the new dimmer and cover plate.
Key Points
- Building codes in most areas let homeowners replace their own electrical fixtures, including dimmers, light fixtures, and GFI plugs.
- Turning on the light, then shutting off the breaker to see if it goes off is a common check, but a burned-out bulb could make you think power is off when it isn't, so a voltage tester is needed to confirm.
- A basic dimmer has two black wires and a ground; if it's a regular switch there are black and white wires with power on the bottom screw and out the top, and the switch works by breaking and restoring the black wire's continuity.
- Old 6-32 mounting screws and the ground wire connection should be handled carefully, since damaged screws strip easily.
- Choosing an oversize cover plate can hide imperfections around an old or damaged switch opening.
Details Worth Noting
- Concrete instructions:
- Turn off the breaker for the circuit, then turn the light on and confirm it stays off, and use a voltage tester on the fixture or switch wires to verify there is no power.
- Remove the cover plate and the switch screws, then pull the switch out of the box and note the wiring.
- For the ground, form a loop at the end of the green wire using the jagged teeth on the grounding screw, slip it under the screw, pinch it closed, and tighten with a number 1 Robertson bit or a flathead screwdriver.
- Straighten the twisted black wires using square-end pliers, applying pressure in a few spots, and trim only as needed since the wires are short.
- Strip the wire with the strip gauge set to 14 gauge (the standard for home wiring), by inserting the wire into the gauge, pinching, twisting, and sliding the insulation off.
- Push each wire into the switch's back-wire holes, ensuring the insulation touches the switch body, and tighten the terminal screws.
- Fold the wires into a gentle S-curve when tucking them back into the box so they can compress without bending awkwardly.
- Start the new 6-32 screws backward briefly to confirm they catch the thread before tightening, and discard the old screws.
- Install the matching cover plate, listening for the click, then restore power and test the dimmer.
- The dimmer in the video shows "top" for the off position, and it slowly raises power to full brightness.
- Use new mounting screws rather than reusing the old ones, since they can be weakened or damaged.
- The presenter notes that home wiring is almost always 14 gauge, but this should be verified for your own circuit.
- Wiring conventions vary: some switches are reversible for the black wires, while standard switches have line in and load out terminals.
Bottom Line
A dimmer swap is a manageable DIY job when the power is verified off with a tester and each wire connection is made carefully, but the instructions are specific to this video's setup and should be checked against your own switch and local codes.