 digest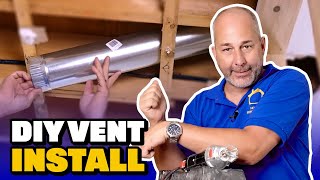
Short Summary
Main recommendation: To run a dryer vent through a brick wall and ceiling, you need to complete the rough-in (cutting the opening, installing the duct and elbow) before the final installation, and pass the required inspections. The video shows this as a DIY process, though it notes that move-related mechanical work typically requires a plumber and electrician, with inspections from both the electrical department and the city.
Key Points
- The rough-in stage (cutting openings, running ductwork, installing the elbow inside the ceiling) must be completed and inspected before the final stage, which the presenter covers in a separate video.
- Duct sizing matters: the presenter uses a 4-inch exhaust pipe for the ductwork, while the fan exhaust outlet is only 3 inches, so the opening is sized to the 3-inch fan exit; standard code calls for 4-inch duct.
- Cutting blind is risky, so the presenter first locates framing and wires before cutting, using a Rotozip or a hand saw held at the tip only.
- Contractor availability is difficult, so the presenter suggests learning to do work yourself where feasible.
- Tapered duct ends must point in the direction of airflow, and the pipe may need shortening to fit into the ceiling cavity.
Details Worth Noting
- Concrete instructions:
- Locate framing and wiring before cutting. Use a Rotozip, or a small hand saw using only the tip, and avoid going deep enough to cut wires (the presenter notes doorbell wire is present).
- Remove any strapping that is in the way with a reciprocating saw.
- For the brick exterior: measure the opening from mortar joint to mortar joint, sized about 3 to 3 1/4 inches wide for the 3-inch fan outlet. Remove all mortar first, since the brick then breaks off easily, then drill four holes with a regular wood bit.
- Cut through the opening with a sawzall. Seal at the opening, get past the foam, square it off, press the duct in, and set it.
- Reinstall expansion foam around any broken-away areas to restore the thermal barrier.
- If the ceiling cavity is too tight, shorten the pipe by removing one section so it fits.
- To connect the elbow, hold the pipe and rotate the tapered joints inside the ceiling until they seat.
- Cover the ductwork hole with a C-channel box once the elbow is connected to the outside exhaust.
- The presenter notes with surprise that one piece of exhaust pipe he picks up turns out to be 5-inch rather than the 4-inch standard.
- Use adhesive sealant and expansion foam around the duct to complete the seal.
- Check local code and inspection requirements before starting, since the presenter describes two inspections (electrical and city).
Bottom Line
Running a dryer vent through brick is manageable as a DIY project if you locate framing and wiring first, size the opening correctly, seal and insulate the duct, and complete the rough-in for inspection before finishing the job.


