digest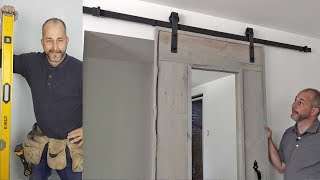
Short Summary
Main recommendation: Install a hanging barn door by first securing solid backing (a 2x8 or a board fastened to the framing) to the wall structure, mounting the overhead rail into that structure, and then adjusting the door's hardware to clear uneven trim or texture. The video demonstrates this on a basement door hung from a steel beam, with a custom barnwood door and a full-length dressing mirror.
Key Points
- Mount the rail only into solid wood structure, never into drywall alone; the heavy lag bolts can pull out and drop the door, which the presenter warns could land on someone in the night.
- If the rail has fixed mount points that don't match studs, build the backing in advance (e.g., a 2x8 inside a steel beam) rather than cutting drywall and patching afterward.
- Plan the height from the door's total height plus the bottom gap and rail thickness, leaving about two inches between the door wheel and the top of the door for the wheel to clear the rail.
- Modify the door, not the hardware, when the wall surface is uneven, because this kit includes no spacers.
- Pre-drill lag bolt holes and tighten them just until movement stops, since over-tightening strips the wood and leaves nothing to hold.
Details Worth Noting
- Concrete instructions:
- Measure the door height (here 81.5 in) plus a 0.5 in bottom gap, for 82.5 in total, and mark the rail's center height on the wall; add 1.5 in for the rail thickness and mark level.
- Leave a 2-inch gap between the bottom of the wheel and the top of the door so the door can go up and over and sit on the rail.
- Pre-drill each lag bolt, then lift the rail into place and tighten until the wood stops moving, then add only about a half turn more.
- Install end stops, positioning the one at the door end a couple of inches in from the corner so it contacts the door mount; set the other end stop just to prevent hitting the wall.
- To correct for a raised surface, mark the door at the mounting hole centers, trim the back of the door with a circular saw (keeping the blade set just behind the mount area), and pack the hanger bolt with washers to match the standard door thickness; the wood was 1 inch thick.
- Hang the door by lifting it onto the rail, centering it with about a 1-inch overhang on each side, then tighten the bracket set screws with an Allen key so the door stops at the correct travel point.
- Finish with the sliding discs so only the disc contacts the baseboard trim; the semi-gloss trim paint handles occasional contact and is easy to touch up.
- Check the hardware package before installation; the presenter found only one machine nut and one washer/label in the carriage bolt package when two of each were needed, joking in frustration about having to return to the store.
- Use a brushless drill driver to tighten the lags, since its torque pulses help drive through knots and thick wood.
- The steel beam was covered with a 2x8 for structure, and the electrical was intentionally kept on the side wall, not at the door location.
Bottom Line
Secure the rail to solid wood backing before hanging, because the hardware's lag bolts can only hold a heavy door if they are anchored into structure rather than drywall.