digest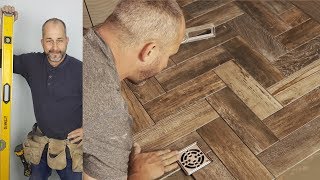
Short Summary
Main recommendation: install a herringbone porcelain tile shower floor by back-buttering each tile, following the shower pan's slope to the drain, and setting tiles with a non-modified cement-based latex bond coat (the speaker mentions his own company's product, Caribbean Bond, as an example), which is designed for use with the Schluter system. The presenter stresses keeping tile angles true to each other rather than following the room's walls, since most rooms are not square, and working patiently so the pattern does not drift.
Key Points
- Use a non-modified cement-based latex thinset (the speaker names Caribbean Bond), not regular wall tile cement, because the wall cement will not bond to the plastic Schluter membrane.
- Keep the floor sloping toward the drain while keeping the outside of the room higher than the drain, so water collects in one spot.
- Take tiles from several boxes or pull random pieces, since each herringbone piece is a unique wood-look image and no arrow orientation is needed.
- Herringbone is a traditional European hardwood-floor layout from 150 to 200 years ago, which is why it suits wood-look porcelain.
- The Schluter drain is a three-part system (collar, insert, adjustment plate) set in cement, with a waterproof membrane and a secondary drain mesh that catches water that gets under the tile.
Details Worth Noting
- Concrete instructions:
- Set the house slope by changing trowel sizes as you move outward: start with a small trowel, then a 1/4 in, 3/8 in, and 1/2 in notch to keep the bed sloping out to the room edge, checking with a level.
- Spread the bond coat evenly over the floor, and back-butter each tile before placing it.
- Set tiles flush against the spacer line and move them in both directions to create grout space. Do not press tiles into the bed; back-buttering avoids needing pressure and keeps grout lines clear of cement.
- Set tiles by dragging a grout float lightly toward the drain so the tiles follow the contour without pounding.
- Stop every few tiles to check the herringbone pattern, since it can drift without you noticing.
- Score porcelain with a scratch cutter or tile cutter, then snap along the scored line; a new cutter wheel costs about four or five dollars, so a costly cutter is not needed.
- For the drain, cement the waterproof membrane into the drain collar, slide the adjustable plate to a level matching the tile, then set the drain about a hair below the tile surface.
- Mark each cut with a spacer for the grout line, check the mark against the adjacent piece, then cut.
- The speaker says the adjustable drain works from about 1 in down to near zero, so it fits different floor build-ups.
- The speaker says the offcuts from cutting this layout can often be reused, so little tile goes to waste.
- The speaker says a cheap tile cutter with a fresh wheel can produce clean cuts on this small porcelain tile, though he also uses a wet saw for other projects.
Bottom Line
A herringbone porcelain shower floor is manageable for a DIYer if the bond coat is correct, the pattern is checked often, and the floor is sloped to a waterproof drain, with the slope kept intentional rather than made perfectly level.