 digest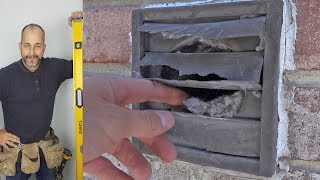
Short Summary
Main recommendation: Replace a dryer exhaust vent by fully removing the old vent and mortar, then sealing the new vent in place with exterior caulk so moisture and pests can't enter the house. The presenter notes that many dryer vents are installed with caulking alone and no screws, which can let moisture into the home.
Key Points
- The exterior vent is a louvered cover that becomes brittle from sun and UV exposure, and animals can chew into it, especially in the fall.
- In this installation, the old vent was held with mortar mix rather than foam, and a second pipe layer had been placed inside, so the presenter cleared out the whole opening before reinstalling.
- The standard vent extension was too short for a two-by-six wall with brick, so an extra piece of four-inch perforated or dimpled pipe was added to reach the inside duct connection.
- The presenter attached the new vent with exterior adhesive sealant rather than screws, because there was nothing solid to hold screws against the brick.
- A bird screen sits on two pins and can be removed for cleaning, since dryer lint will clog it over time.
Details Worth Noting
- Concrete instructions:
- Wear gloves and break the caulking joint around the vent with a 5-in-1 tool, taking care near brick edges.
- Remove the old vent and all mortar, then clear the hole so the new parts have a clean surface to adhere to.
- Extend the wall passage with four-inch pipe (perforated or dimpled edge) if the supplied extension is too short, attaching it on the inside to the dryer duct connection.
- Line up the new vent, mark the holes with a fine-point marker, and drill with a quarter-inch masonry bit (hammer mode on a drill for speed; the presenter notes a bit of poor quality can slow things down).
- Cut the caulk tip at an angle and use the side of the tube to push the adhesive into the drilled holes, without pushing on the vent itself.
- Hold the vent in place with the fins open, fill until sealant squeezes out, and smooth lightly or leave it, since the seal matters more than appearance.
- Let the sealant set overnight before reconnecting the dryer the next day.
- Plastic wall anchors and regular screws are an alternative the presenter mentions, though the adhesive method was used here.
- Dryer lint will clog the vent and screen, so the presenter treats this as a recurring maintenance task.
Bottom Line
A proper dryer vent replacement is about sealing the opening against moisture, pests, and drafts, which a caulk-only install often fails to do. Clean the opening fully, use the correct extension length, and seal the vent well, then keep the screen clear of lint.


