 digest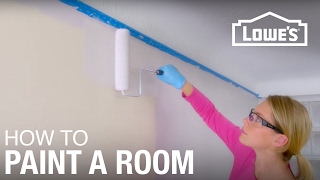
Short Summary
Main recommendation: Paint a room from the top down, in the order ceiling, walls, then trim, using two coats and a prep step first. The video frames a quality paint job as a low-cost way to transform a room, with careful buying, cutting in, rolling, and cleanup as the core steps.
Key Points
- Buy enough paint by estimating square footage: one gallon covers about 400 square feet, and the video gives a length-times-height formula for each wall.
- Mix multiple gallons together in a 5-gallon bucket ("boxing") so the color stays consistent across the room.
- Cut in the edges with a brush before rolling, which is the same general process for the ceiling and the walls.
- Remove painter's tape soon after the paint dries to avoid peeling, but check any specific removal time on the tape packaging first.
Details Worth Noting
- Concrete instructions:
- Before buying, measure each wall: multiply length by height to get square footage, then add up the walls. For trim, multiply the trim length in feet by 0.5 to estimate its width-based coverage.
- Divide total square footage by about 400 to estimate gallons needed. For help, use the calculators at Lowes.com/Calculators.
- Order of work: ceiling first, then walls, then trim. Paint one wall at a time for each coat, two coats per room.
- Cut in: dip the brush about one third of the way into the paint, tap off the excess against the sides (do not scrape), and hold the brush like a pencil. Use smooth strokes and feather the edges to prevent runs.
- Roller prep: dampen the roller cover with a wet rag first. Dip only a little way into the paint, roll a few times to even it out, and do not submerge the roller.
- Rolling: start near the edge and roll in a zig-zag pattern, rolling in several directions on textured walls. Work in 4-foot sections, top then bottom. Go slowly, do not press or squeeze the roller, and reload instead.
- Finishing touches: turn the roller sideways near the ceiling and baseboards, then lightly roll over painted areas to remove buildup and runs (called "laying off").
- Breaks: cover the bucket and wrap the brush and roller. Store them in the fridge if they will be used the next day.
- Trim: after walls are fully dry, run painter's tape along the wall-trim edge and press it down with a plastic putty knife. Remove the tape after the trim paint dries, using a knife along any stuck spots.
- Latex cleanup: rinse the brush under water, clean the bristles with a cleaning brush, work in hand cleaner, rinse again, and reshape. Clean roller covers with a 5-in-1 tool and store them upright.
- Painting the ceiling and walls requires a slow hand, since rolling too fast causes spatter.
- Getting a little paint on the trim is acceptable because trim is painted later.
- The video suggests a "Lowes.com/Paint" resource for more paint project help and a prep video for surface preparation.
Bottom Line
Preparation, correct paint quantity, and a disciplined top-down sequence matter more than speed for a clean, even paint job.


