digest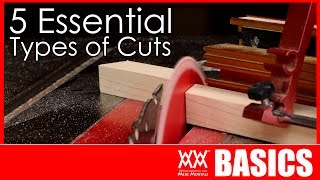
Short Summary
Main recommendation: Learn the five most common woodworking cuts (crosscut, rip cut, resaw, miter cut, and curved cut) and match each cut to the right saw, using a table saw and jig saw as a budget starting pair. The speaker notes that power tools only are covered and that a bandsaw is the best fit for resawing and curves, while a table saw suits most crosscuts and rips. Several cuts can be made on more than one tool, but the video stresses that precision and safety depend on the setup.
Key Points
- The five most common cuts, as named in the video: (1) Crosscut, (2) Rip cut, (3) Resaw, (4) Miter cut, (5) Curved cut.
- A crosscut slices across the grain to shorten boards; a rip cut runs along the grain to set width.
- Resawing means sawing a board along its edge to make thinner boards, which the speaker says also yields more usable wood from the same purchase.
- Miter cuts are any cut at an angle other than 90 degrees, usually 45 degrees for four-sided pieces.
- Curved cuts open up design options; a bandsaw is the preferred tool, while a jig saw is needed for interior holes.
Details Worth Noting
- Concrete instructions:
- Crosscut on a miter saw: hold the board against the fence, keep your hand clear, pull the trigger, lower the head slowly, release the trigger, and wait for the blade to stop before raising the head. Boards narrower than the blade diameter can be cut.
- Crosscut on a table saw: use a miter gauge, let the blade reach full speed, pass the wood slowly through the blade, and keep hands a safe distance away. A crosscut sled gives more accurate results.
- Rip cut on a table saw: keep the fence parallel to the blade, never freehand, use push sticks or a gripper for narrow rips, keep constant downward pressure and pressure toward the fence, avoid pressing the cutoff side, and use an outfeed table for long boards.
- Resaw on a table saw (speaker's advice is to avoid altogether unless you have a really good setup): resaw only narrowish boards, cut half the width then flip and cut the rest, use a zero-clearance insert, a feather board against the fence, and push sticks or blocks.
- Miter cut on a miter saw: set the angle (positive stop at 45 degrees), hold the workpiece, and cut as with a crosscut. On a table saw, set the miter gauge to the angle and cut; a miter sled is calibrated for 45 degrees.
- Curved cut: draw the line, cut just outside it, then sand to the line; use a narrower blade for tight curves. For interior holes, use a jig saw, going slowly to avoid blade flex and beveled edges.
- Buying advice: a table saw and a jig saw can handle almost any project on a budget.
- Circular saws and jig saws can make rough crosscuts and miters with a square guide, but are not recommended for precision work.
- The bandsaw cannot reliably rip straight with the speaker's older saw; the speaker says a quality, well-tuned saw with a wide blade is needed for rips and resaws.
- Resawing leaves saw marks and ridges that can be cleaned with a planer or sanded.
- The speaker says the video covers power tools only and recommends his table saw basics video for safety tips.
Bottom Line
Start with a table saw and jig saw, learn the five core cuts, and use the matching saw and setup for each, prioritizing safety whenever a cut is risky.