digest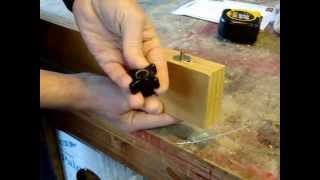
Short Summary
Main recommendation: Build a sacrificial drill press table from 3/4-inch plywood with a 1/4-inch replaceable slide-out top panel system and a T-slot fence, rather than relying on the small round table most drill presses ship with. He says he didn't design it himself and came across the plan in a woodworking magazine or book.
Key Points
- His drill press came with a small round table that he found inadequate; he says chances are if you have one like that, you'll need to make a replacement.
- The base is one 3/4-inch plywood piece with a dado cut on each side, and the top is a 1/4-inch panel (the presenter used oak so it could be waxed and kept smooth).
- The top is made of slide-out panels that replace damaged sections when drilling too deep, so the table can be repaired instead of rebuilt.
- The fence uses two sandwiched and glued 3/4-inch plywood pieces with dados and T-slots, using toilet bolts and knobs to clamp it anywhere on the table.
- The presenter says the fence is about 1.5 inches, is useful for stop blocks, and extends over the back so clamps can be placed behind it.
Details Worth Noting
- Concrete instructions:
- Start with one 3/4-inch plywood base and cut a 3/4-inch dado all the way along one side and the other side.
- Cut a top from 1/4-inch plywood (oak in the video) to the same outer dimensions as the base.
- Cut several slide-out panels to the same size, with an angled edge (he's not sure of the exact angle, maybe around 10 degrees) that flares out so the panels hold in place and don't lift when pushed; the top panels are cut at the opposite angle.
- Cut out the center section of the 1/4-inch top piece, leaving a gap; glue the outer sections to the base, but do not glue the center section so it can slide out.
- Flip the assembly and cut a 1/4-inch dado through the center at the same spot as the 3/4-inch dado to make a T-slot.
- For the fence, cut a dado on each of two 3/4-inch plywood pieces (about 1/8-inch deep on each side, 3/4-inch wide, centered), then glue them together as a sandwich.
- Buy toilet bolts (sold in packs of two, in several lengths; the presenter's are about 4 inches) and knobs that fit them; the T-shaped heads slide into the T-slot, with a washer on top.
- Wax the table surface and reapply occasionally so the fence slides smoothly.
- Caveat: the presenter did not design the table and credits a magazine or book; no source is named.
- Repair method: if a panel is drilled through, replace only that panel.
Bottom Line
A few plywood pieces, a table saw, and inexpensive toilet bolts can turn a drill press into a more capable tool, and the replaceable panels make it easy to maintain.