digest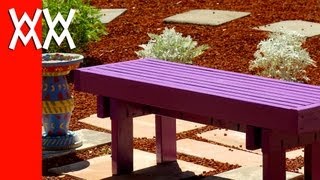
Short Summary
Main recommendation: Build a budget-friendly outdoor park bench from seven 2x4s, using 3/4 in dowels and pocket screws for assembly, with a purple paint finish as a lighthearted example color choice. The video walks through cutting and painting the seat slats, drilling dowel holes, spacing and attaching the slats, and assembling the legs and stretcher.
Key Points
- The bench uses seven 2x4s, and the host notes it can be painted any color, including purple.
- Seat slats are cut to length, sanded, and painted before assembly because the 1/4 in gaps make finishing them afterward impossible.
- Slats are joined with 3/4 in dowels, which vary widely in diameter, so test fits matter.
- Leg assemblies and the stretcher are joined with pocket screws, and assembly proceeds from the center outward.
- Painting is done in stages, with the underside drying overnight before a second coat is applied the next morning.
Details Worth Noting
- Concrete instructions:
- Cut all seat slats to length from the 2x4s, then sand them before painting.
- Mark 6 in from the side of each seat slat and drill a 3/4 in hole through each, using a stop block on a drill press for consistent placement; a hand drill also works.
- Before buying dowels, drill a couple of holes in a scrap board and bring it to the hardware store to test-fit dowels for a tight fit.
- Paint the inside faces of the caps and the underside of the stretcher while accessible, then let the underside dry overnight.
- Thread the 3/4 in dowels through the slats, secure the front piece with a screw, and then space the boards 1/4 in apart using scrap 1/4 in MDF as a spacer wedged between boards, screwing each into the dowel.
- Drill pocket holes in the leg boards and stretcher, then assemble starting from the center beam and working outward.
- Lightly sand between coats to remove bumps and rough areas before applying a second coat.
- The host admits to a mistake: the wet paint made boards stick together, so it's better to place the first board and feed the rest on one at a time.
Bottom Line
The bench is a simple, low-cost weekend build, but painting and dowel fit need planning ahead, since the 1/4 in gaps and wet paint make the order of steps matter.