digest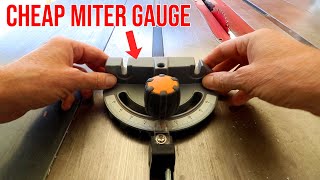
Short Summary
Main recommendation: Upgrade a stock miter gauge that came with an affordable table saw by tuning it for accuracy and fit, then adding a wooden auxiliary fence (extension fin) with stop blocks for better support and repeatable cuts. The video also warns never to combine a miter gauge with the rip fence for through-cuts, because the offcut can get trapped and kick back.
Key Points
- Miter gauges are mainly used for cross cuts (cuts across the grain), and a freehand cut on a table saw should never be attempted because the board can twist, bind, and cause kickback, which the video calls the leading cause of table saw injuries.
- A stock miter gauge often leaves much to be desired, so calibrating its 90-degree and 45-degree positive stops and fit in the miter slot is worth doing before cutting.
- An extension fin attached to the gauge supports longer boards and reduces tear-out on both sides of the cut.
- Stop blocks clamped to the auxiliary fence allow repeated cuts of the same length, and the offcut should be removed after passing the blade rather than slid back.
- Never use the rip fence as a stop block while a miter gauge is in use, because the cut-off piece can get trapped between the blade and the fence and kick back.
Details Worth Noting
- Concrete instructions:
- Check square: run a board through the saw, butt the ends together along a straight edge, and flip the boards; if they don't meet neatly, adjust the 90-degree positive stop (usually a hex screw; check the manual if you can't find it).
- Check 45-degree stop with a combination square or triangle before making miter cuts.
- Fit the gauge: it should slide easily without wiggle. If it wiggles, apply masking or vinyl tape along one or both sides, or pound a nail or nail set in a few places along one side to crown the bar, then sand down if too tight. Some gauges have expanding plastic rings to adjust the fit.
- Add an extension fin of straight, unwarped scrap, such as 3/4-inch plywood, using the gauge's holes or slots. Extend it to or slightly past the table's left edge and a little past the blade on the right.
- Set a stop block: clamp a scrap at the required distance from the blade, cut, then remove the workpiece after it passes the blade.
- For a picture frame: cut one miter on the ends of two (or four) pieces, clamp a mitered stop block to the fence at the frame length, then set the mitered end against it and cut the opposite end.
- The video notes that gauges differ by brand, so the adjustment method varies.
- The "fancy" and older gauges shown are examples; the instructor focuses on the small gauge from a Rigid saw.
Bottom Line
A stock miter gauge can produce accurate, safe cuts once it is squared, fitted, and extended with a wooden fin and stop blocks, and the rip fence must never be used as a stop during miter-gauge cuts.