digest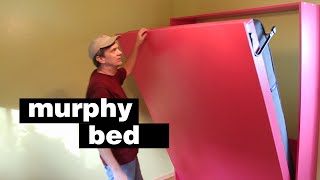
Short Summary
Main recommendation: Build a Murphy bed using a commercial hardware kit (the speaker bought his from murphybeds.com) combined with your own carefully measured plans, to free up floor space in a room. The build is a cabinet with side panels, rails, cleats, and a lift mechanism, assembled partly in the bedroom because of the room's cramped layout.
Key Points
- A Murphy bed kit supplies the lift mechanism, special screws, and L-brackets, so the builder mainly constructs the cabinet around that hardware.
- The kit's included instructions are text-heavy with few drawings, so the speaker drew his own plans based on them.
- Plywood is roughed out to size first because the tablesaw can cut accurately but cannot handle full sheets.
- Lift-mechanism holes must be marked on both side panels individually, since stacking and drilling them together risks misalignment.
- Assembly is split: sub-assemblies are built in the shop, then the finished cabinet is assembled and anchored in the bedroom.
Details Worth Noting
- Concrete instructions: Edge-band all exposed plywood edges with iron-on wood edge banding, then trim flush with a trimmer that has a razor blade and sand smooth.
- Concrete instructions: Attach the L-brackets (from the hardware kit) to the header and stretchers, butting them against a scrap board to keep ends square.
- Concrete instructions: Mark and drill lift-mechanism holes on each side panel separately, using a brad-point bit to prevent wandering, and countersink the holes on the outside faces.
- Concrete instructions: Clamp the top piece to the sides (two pipe clamps joined together work when standard clamps are too short), then drill screw holes; take the assembly apart before final assembly.
- Concrete instructions: Join plywood pieces with biscuits along each edge, drill small pilot holes through the rails with a drill press, and mark rail corners so holes line up during assembly.
- Concrete instructions: Glue and screw cleats flush with the bottoms of the rails, then screw the four rail assemblies together using the kit's special screws.
- Concrete instructions: Secure the finished unit to wall studs with L-shaped brackets.
- The lift mechanism folds the legs up to hold the mattress; lifting the bed raises it, and it folds gently into the cabinet.
- The speaker notes the room is tight, so assembling in place was easier than moving the unit in.
- The project is part of converting a guest room into a craft room, and the speaker mentions more space-saving projects coming later in the year.
Bottom Line
A Murphy bed is a practical floor-space saver that is buildable from a kit with careful measuring, cleanly edged plywood, and in-place assembly for tight rooms.