digest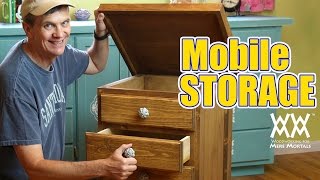
Short Summary
Main recommendation: Build this small rolling storage cabinet for sewing supplies, using 1-1/2 inch (38 mm) furring strips or wider boards ripped to size, pocket screws for joinery, and 1/2 inch (13 mm) plywood drawers. The video walks through assembling the frames, adding drawer runners and a recessed bottom, building and fitting drawers with a dado stack, and attaching decorative drawer faces with knobs. A fake top drawer with a lift-up lid holds spools of thread.
Key Points
- The cabinet is designed to be made from common 1-1/2 inch (38 mm) furring strips, though the host had to substitute wider boards that he rips down.
- The bottom is inset slightly so the casters/wheels are partly hidden, attached to cleats with glue and tacks.
- Drawer bottoms sit in grooves cut with a dado stack; the host notes a router could also be used.
- Drawers are glued and tacked together with their bottoms at once, which helps square them up; he test-fits one before building the other three.
- The fake top drawer front is a lift-up lid for spools of thread, and the host plans small spool inserts for it.
- Drawer faces receive a decorative profile and are finished with antiquing wax instead of paint.
Details Worth Noting
- Concrete instructions:
- Join the four face frames (front and back are slightly wider than the two side frames) with pocket screws.
- Use a spacer board to evenly space the drawer divider boards on the front face frame, screwing each into position.
- Glue and tack the bottom piece onto the cleats inset from the frame, then drop the back in.
- Glue and tack the drawer runners to the sides, using the same spacer to line them up.
- Cut drawer bottom grooves with a dado stack (or a router), then glue and tack drawers together with bottoms in place to square them.
- Top: a plywood panel with strips added as edge banding.
- Drill a three-part knob hole: drill a small pilot hole through the drawer face and drawer centers (found by connecting diagonals), enlarge from the inside guide with a larger bit, then drill through the drawer face. Use a washer under the screw so it seats in the large hole.
- Attach drawer faces with one knob first, adjust for alignment, then add screws from the back.
- Clamp the false drawer front into place before screwing it on.
- The host says that if the top compartment will hold clutter, it can be made a working drawer instead of a fake one.
Bottom Line
A modest, beginner-friendly rolling sewing cabinet built from simple joinery and drawers.