digest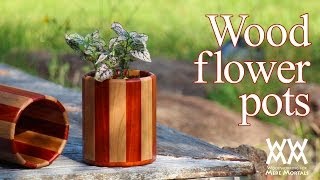
Short Summary
Main recommendation: make wooden flower pots by rolling thin, beveled wood slats into a tapered cylinder, then sealing the inside with pour-on epoxy to make it waterproof. The method is a simplified version of Carmen Salamone's wooden tankard technique, with the handle removed and the pots made larger. The video presents it as a unique gift project that invites experimentation with slat width, thickness, and bevel.
Key Points
- The pots are built from ¼" thick boards, resawed and planed, then ripped into strips with a 12-degree bevel and cut into 1"-wide, 5"-long pieces.
- Strips are glued edge to edge and rolled into a cylinder, with the number of slats varying (16 on a test version, 14 on the final one), so slat count depends on size and bevel.
- The bottom is made from two edge-joined ¼" panels, with the top edge rounded over before the base is attached.
- The inside is waterproofed with a pour-on epoxy, which the host says forms a hard, thick, almost plastic surface after drying overnight.
- The outside is finished with spray lacquer.
Details Worth Noting
- Concrete instructions:
- Resaw and plane boards to ¼" thick.
- Rip strips with a 12-degree bevel on one edge of each strip, then move the fence and cut 1"-wide strips.
- Crosscut the strips to 5" lengths using a crosscut sled.
- Clamp a straight plywood piece to the workbench, lay two pieces of sticky-side-up masking tape, tape the ends down, and butt the slats against the plywood to line them up.
- Squeeze glue between each slat, then roll carefully. Secure with rubber bands or hose clamps.
- Round over the top edge with a ¼" roundover bit, cutting the piece oversized so it can be sanded flush.
- Trim the base flush with a flush trim bit in a router, then ease the base edges with the same ¼" roundover bit.
- For epoxy, pour equal parts hardener and resin using measured cups, stir for two minutes, pour into a clean cup, stir for another minute, then pour inside and spread with a disposable brush.
- The host notes that if you cut extra pieces, you should be fine when the slat count is uncertain, rather than calculating it mathematically.
- The epoxy manufacturer claims one thick coat equals 50 coats of varnish, which the host jokingly questions, saying he'd be happy with 40.
Bottom Line
This is a practical, gift-friendly woodworking project that trades a handle for a larger pot, with the epoxy liner as the key step for waterproofing and the slat count adjustable to fit the build.