 digest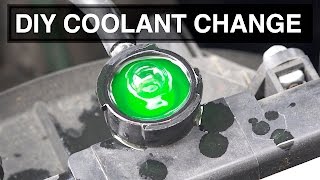
Hello everyone and welcome. In this video we're going to be learning how to change the coolant in your car. Now, in the service manual for my 1999 Acura Integra, it recommends replacing the engine coolant every 45,000 miles. This video is the third of a three-video campaign where I've teamed up with AutoZone to show how simple and cost-effective some preventative maintenance tasks can be.
Before getting started, the first thing you want to do is make sure your temperature control is on maximum heat. For modern cars, this is often an electronic control, so you may need to run the car or at least turn the ignition on beforehand to make sure your heater core is opened up. This will ensure that you replace all of the coolant in your car before working on the car in any way. It's critical that the engine and radiator have completely cooled down. You'll often see a warning for this on the radiator cap. The first step is to remove the radiator cap. I rested it on top so that no contaminants fall within.
Place a container underneath the radiator and loosen the drain plug. This will typically be on the left or right side of the radiator at the bottom. Allow the coolant to drain.
Next, move your catch pan underneath the engine and remove the engine drain bolt. This removes any coolant that was stuck within the engine block as well as the heater core. When reinstalling the engine drain bolt, it's a good idea to apply some high-temperature thread sealant to the bolt threads and also to replace the washer. For my vehicle, this bolt is tightened to 58 pound-feet. Check your owner's manual for this information. After tightening the engine drain bolt, tighten the radiator drain plug.
Next, you'll want to remove the coolant reservoir, drain it, make sure the inside is clean, and then replace it. After replacing the reservoir, fill it with a 50/50 anti-freeze mix, not exceeding the max line. I'm using a premix solution from AutoZone. You'll want to check your owner's manual to make sure the mix you use is compatible with your cooling system.
Next, you'll add coolant to the radiator. In this case, I'll be adding 4.4 liters, as this is what my car recommends. You'll want to add coolant until it reaches the base of the filler neck. After filling, start the engine and let it idle for a while. Be sure to have the car outside while running it. One of the biggest challenges with cooling system designs is making sure the system can purge all of the air out. In my short-lived engineering career, I worked on designing these systems, and it's surprising how long it can take at times to purge all of the air out. 30 minutes is not unreasonable. You'll want to make sure the engine warms up with the radiator fan coming on at least twice, and then add coolant as needed while the engine is running. It's a good idea to check for leaks while you wait. Once all of the air is out of the system, fully tighten the radiator cap, run the engine one more time, and check for leaks. If there aren't any leaks, you're good to go.
The total cost to do this repair myself, including the cost of 2 gallons of coolant and thread sealant, was $27.37. Obviously, you'll need the tools as well, but these are items you might already have. Also, AutoZone rents all kinds of tools for free through their Loaner Tool program, such as the torque wrench you may use on the engine drain bolt.
Of course, a huge thank you to AutoZone for sponsoring this video, and thank you all for watching. If you have any questions or comments, feel free to leave them below.