 digest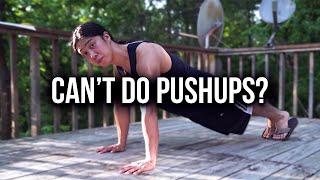
Hello my friends, this is your brother Hampton from Hybrid Calisthenics. This is the 2022 version on how to build up to a push-up. Two years ago I made a long version and a short version of this called "You can do push-ups, my friend," and I stand by that statement. As you can see in the comment section, a lot of people discovered that they could in fact do push-ups. Congratulations. Since then they've both gotten decent views. However, I wanted to make an updated version because I have learned better ways to teach the push-up in the past two years, largely through answering questions from our wonderful community, that's all of you. Hopefully this one will have slightly better visuals because I'm using an actual camera. A lot of my content in 2020 was made just with a smartphone, this smartphone in fact, not even with the back camera, which everyone recommended because it has better quality, but the front camera, because I was just getting started and I wanted to see what I was doing while I was recording.
Anyway, as a fun fact, just like I said in the video two years ago, despite what some internet trolls might claim, there's no reason to feel ashamed if you can't yet do a full push-up. Fitness is a journey and we all start somewhere. That hasn't really changed in the past two years. There are a lot of really strong people who once couldn't do a push-up. Second, you can do push-ups, my friend, because there are many different types of push-ups. Some are easy and some are much, much harder than a full push-up, so we can find a push-up variation that we can do, and we practice it until we're strong enough to move on. You can think of these progressions as weights on a barbell. You might start off bench pressing only the bar, and as you get stronger you can add weight.
Here's a rundown on the method. One, find a push-up variation that you can do competently with good form. Two, practice this variation once or twice a week for two to three sets until you're able to hit the goal standards for sets and reps. Three, when you can reliably hit the goal standards, move on to a harder variation. In the description, you can check out our fitness routine for a lot more detail and more information. It's free.
A few quick things on form before we move on into the actual progressions. I don't want to spend too long on form here, that can be a separate video, and I think people tend to overthink push-up form a little bit. The key is that you can do pretty much whatever you want as long as you build up safely and progressively, but here are some things you can keep in mind. The first is shoulder positioning. If you look at how different people do push-ups across the internet, some people will have the shoulders pushed all the way forward through the entire range of motion, some people keep it more neutral, and others will consciously keep the shoulders back and down and push that way. You can use whichever one you like. However, something I've heard a lot over the past couple of years is, "Hampton, I'm doing push-ups but I'm not really feeling my chest." A lot of people do push-ups to work their chest, and having your shoulders back and down usually allows you to feel your chest a little better, and some people consider that perfect form.
Second is the degree of elbow flare. When you're pushing, you see some people really tuck in their elbows, and they push that way. Others go the other way and have their arms almost at a 90-degree angle. I personally like to tuck in a little bit more, not all the way, but about 30 degrees. Some people go a little wider, like 45. Usually, if you have some shoulder pain, it might feel a little better to tuck in a little bit more.
Lastly, I want to touch a little bit upon body alignment. You see some people do push-ups and they have decent pushing strength, but their body really sags, and as a result they're not really getting much range of motion. It doesn't have to be perfect, but try to keep a relatively straight line from your head to your feet. I keep my feet together, but you can spread them apart. This usually makes it a little more stable and slightly easier. You especially want to keep an eye on your lower back, as there's a tendency to tilt the pelvis forward. When some people do push-ups and say, "Oh, my lower back hurts," that's usually why. Try to keep your abs tight and maintain a neutral back.
A great start to your fitness journey is doing wall push-ups. Here's how they look. Something I hear all the time when talking about this exercise is, "While Hampton, this exercise is just too easy." I hear this from relatively advanced people and also some beginners, interestingly enough. I would say none of these exercises are really meant to demonstrate strength. They're to help us build strength and cultivate long-term fitness, hence the name. Second, yes, I recognize that a lot of you have the strength to do a much harder variation, and sometimes you can do a full push-up. But remember how I said that you can do push-ups however you like, but it's beneficial to know how to do them in different ways. So if you can do a push-up, can you do it with good form? Can you keep your core tucked? Can you keep your arms moving the way you want to? When we start with an easier variation like this, we can really begin learning to move the way we want to, and not how we have to based on lack of strength.
So, one, if in doubt, I really recommend starting here. You don't have to show anybody, you can just do it in your room if you like. All you need is a wall. Another issue some of you face is wrist pain while doing this exercise, especially if you're not used to any kind of pushing motion or you're new to exercise in general. Your wrists may sometimes hurt because they're not used to having pressure on them. What I recommend is experimenting with how you place your hands. I place mine slightly below shoulder width, which just feels a little more natural to me. If this bends your wrist too much and it hurts, try having your hands higher up. Having them too high up can hurt your joints as well and cause pain, so it's not necessarily better. Just experiment. Another thing that may affect this is how far away from the wall you stand. Some people naturally stand very far away, and their wrists hurt because of it. If you move a little closer, you'll find it's a little easier on your joints. Experiment. I stand about arm's length away. The final thing I'll talk about here is how you position your feet. I usually have mine together. It sometimes helps to be on your toes a little, like this, which just makes it seem smoother for me. It's something you can experiment with, not something you have to do. If this exercise is still too hard, there's no reason to feel ashamed. You've got to start somewhere. A slightly easier variation is spreading your feet like this, which also makes it more stable.
Okay, the next progression you can do is called an incline push-up. That's just leaning further forward. You can do them at different levels. We'll start with something around chest height, around torso height. They look a bit like this. The premise is very similar to wall push-ups, with the difference being that we're leaning further forward, which makes it harder because we're putting more weight on our bodies. I happened to find a railing that was slanted this way, which is very handy, but you may not have that. You can use a table or a railing. I know these aren't exactly at chest height and hip height, or whatever I'm writing in the comments and in the routine, but chances are you won't be able to find those exact heights around you anyway, so just work with what you have. Just make sure it is safe and secure. Anything glass or fragile is out of the question.
Moving on to our next stage, these are also called incline push-ups, but they're more advanced because we're leaning further forward, so they're called advanced incline push-ups. If you have a better name, I'm open to ideas. Here's how they look. You can do them on a chair or chairs, or you can use a stool like this. Remember to make sure it's secure, that it doesn't slide around or hurt you, because that's bad for you. As I mentioned before, there's not that much difference between advanced incline push-ups and regular incline push-ups. They are simply harder, and because they're harder, they can make us stronger. But there's also a tendency to start sacrificing form around this time, so it's very important that we don't sacrifice form and think we're getting better when we're actually not. A good idea is to film yourself during your sets and then watch back. Film yourself doing a wall push-up, or something you know you can do very well, for 5 to 10 reps. Watch that and look at your form, then do the advanced incline push-ups and see if the form is fundamentally the same. That's a great tip and idea for every exercise, but it really helps when we start to progress to harder variations.
Next, we're finally touching ground with knee push-ups, also called kneeling push-ups. Here's how I do them. It's interesting to note that there's some stigma and shame around this exercise. Some people will refuse to do them or think they're humiliating because other people will call them "girl push-ups." We have just explored three different variations of push-ups that are easier than full push-ups and easier than knee push-ups, so it's interesting that there's stigma and shame around this specific exercise. To once again compare to weightlifting, let's say bench pressing 135 pounds is a full push-up, and a knee push-up is slightly easier at 115 pounds. We only choose to shame people who bench press 115 pounds. There's 90 pounds, but that's okay. There's 75 pounds, but no, they're totally fine doing that. There's 40 pounds, but that's totally fine. There's only stigma around 115 pounds, and there's only stigma around a knee push-up. This is a great exercise to build strength, muscle, and fitness, especially coming back from an injury. I wouldn't ignore it just because some people don't like it. Personally, I've found those people are very insecure themselves, so reach out and DM them a smile emoji or blue heart. After you hit the goal standards for knee push-ups, we can begin to move into full push-ups. Congratulations on that, by the way. Over the past few years, people have mentioned that they can sometimes hit the goal standards for knee push-ups but then are unable to do even a single full push-up, so there are some in-between steps we can explore, which I'll show here.
As you begin transitioning from knee push-ups to full push-ups, I'm on a table, which isn't necessarily the safest, but you can better see what I'm doing. There are a few things I would change. First, you can go down like a full push-up and then come up like a knee push-up. It's a little harder to do the full push-up, but it's easier to control the descent. Really control it like this, then put your knees down and come up like this, and you can simply do your sets that way. Another thing you can try is beginning your workout sets. Before you do the knee push-up, or the one I just showed, however you want to try it, go down into the bottom part of a push-up position and try to push up as hard as you can. You can't really see what I'm doing, but imagine I'm pushing up as hard as I can. Just breathe normally, hold for 6 to 10 seconds, and try that. You might feel yourself shake a little, and after those 10 seconds, rest for about 20 to 30 seconds, then try it again. This will help you build strength in the lowest part of the range, which is usually the trouble area for many of us. After you begin to notice movement and you can stay a few inches off the ground like this, try to hold this for time. If you try to move up right away, you might feel your joints pop a little, and there you go. That's how I would build to a push-up.
If you get this far, congratulations. Comment below or tell me somehow, "Golly G Hampton, now I can do a push-up just like that," and then give me a high five. That's my 2022 version of "You can do push-ups, my friends." I hope you find it helpful. If you build up to a push-up using this method, please spend a few weeks, up to a few months, really honing your technique. After you can do your full push-up, make the next one clean, so you can derive a lot more benefit from it. Please comment below if you have any questions, and please read the description in case I've updated any information that might answer some common questions. Thank you so much for watching. I hope you have a wonderful, beautiful day, my friend.