 digest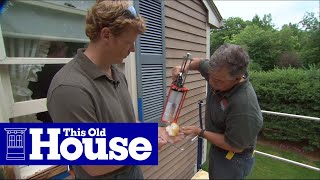
Everyone's house is susceptible to rot, and it's often where wood meets water. On this house, we've got a spot here on the windowsill, and you can see just how far gone that is. When rot comes, there are a few ways you can deal with it. In this case, we could cut out that entire sill and replace it with a new one, or we could cut out just the part where the rot occurs and replace it with a wooden patch. And then there's a third way, the way that Tommy's working on right now.
Hey Tommy. Hey Kevin, what you got over there? Well, I actually have a mullion post between this front door and sidelight, and the bottom of the mullion post was rotted, so I cut out the rot, mixed up a two-part epoxy, put it in place, and formed it. I have a little more work to do on this before I paint it. All right, so this is pretty far along. You're almost done. Is there a spot where you can show this process from the beginning? Well, actually, on the second floor, on that side of the house, I have a window trim that's rotted. I'm going to do the same fix on that.
All right, Kevin, the first thing I need to do is, you can see that the sill is rotted and the side casing is rotted. What I need to do is grind out any rotted wood and get it down to solid wood, because the epoxy won't bond to any rotted wood. To do that, I'm going to use my router with this V-shaped grinding bit. I have to scrape off all the old paint because the epoxy needs to stick to the wood. Now, before we apply the epoxy, I have to apply a bonding agent to the wood so the epoxy will adhere better. To model the epoxy to this profile, I had to make a template, and here's how I did it. I hold the template under the casing and simply trace around the perimeter. Now I cut that pattern out using my snips.
We're using a two-part epoxy. In the kit you have epoxy A and B, and a gun especially designed so that when I put the epoxy in the gun and squeeze it, it dispenses the right amount. All right, that's enough for now. What I want to do is mix it together. So once this is mixed, Tom, how long do we have to work with it? We get about 30 minutes to work with it. So what's your little palette here? It's a piece of Lexan. The reason I like it is because the epoxy will not stick to it. All right, now I'm ready to apply it. Simply push it right in there. Well, you know, Kevin, wood expands and contracts, and the good thing about epoxy is that it flexes with the wood so that it won't separate.
Now I want to get a straight edge on this sill, so I'm simply going to take a scrap piece of wood, slide it under the sill, fill in any voids with my knife, and it'll be straight on the bottom. Now I'm ready to match the detail, and to do that I'm going to use the template I cut. That's about all we can do today. We'll let it set up overnight, and tomorrow we'll sand it, prime it, and paint it.