 digest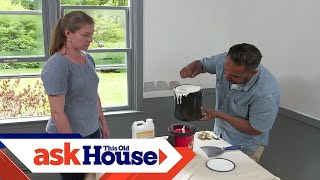
We've been busy making design decisions. We'd like to update the colors in this room: go a little darker on top, white on the bottom, as well as the trim around the windows. We've got our paint samples on the wall. We did the ceiling. Oh good, thanks. It made a huge difference in the room, which was really amazing. But before we got to the walls, we were thinking about the windows, and that's where we got really nervous. The trim is really dark. We didn't want to slap a lot of paint on there, get paint on the glass, or jam up the window, so we got stuck.
Okay, but I'm happy that you start with the ceiling. That's the first thing you do when you paint a room. But I will show you the right sequence to do this job. Awesome. Okay, since you've already had the ceiling done, let's work on the trim. Why are we working on the trim first and not the walls?
Okay, it's very easy for you to cut the trim first and then the walls. Okay, okay. We're going to start with the window here. I'm going to show you this, brother. Okay, this is a liquid mask. I'm just going to apply it to the glass to avoid overspill paint. It goes on white and dries clear. Okay, you want to try to do some work? Sure. Always start at the corner. Yeah, going across. Yeah, long strokes. Mm-hmm. You can go back and forth all the way down, and then you can go. Yep, and you don't need too much pressure on the brush. Just go nice and smooth. Okay, beautiful.
Well, now that the liquid mask has turned from white to clear, it's time for me to put my second and final coat. Well, Rebecca, we're waiting for the mask to dry for a second coat, and I'm going to show you what we picked for your trim. This is a white semi-gloss finish. Okay, okay. It's actually this one here, you can see it. Yeah, it looks a little shinier than what I was expecting. I was thinking maybe an eggshell or a matte for the trim.
Well, let me walk through these paint finishes. The high gloss finish is really hard to apply, but it's really easy to clean, most popular for doors and trim. Semi-gloss is the same thing: really hard to apply, really good for trim, easy to clean up. We'll pick up people's hand grease and oil and everything, really good to clean up. Satin finish has less sheen than the other two, not so hard to apply, but it's not as durable as the other two. That's one of the most popular finishes for cabinetry and some trim. Then we go to the eggshell, which has this flatter look, really good for walls and plaster walls. Matte finish has no sheen at all, and it's also not good for high-traffic areas because it's really hard to clean.
All right, then I guess we're going with the semi-gloss. Sounds good. It looks like my masking liquid is drying and turning clear. Time to paint some trim. All right, sounds good. Okay, so first, what we're going to do, again, I am going to pour some of this paint into this little bucket. You should never work out of the paint cans. You know why? You might bring in some paint and a breeze, you might bring in some dust into the paint can, and then you're going to ruin it. Okay, okay. I always get a little container and drop some of the paint right in there. That's good enough.
So now, also before we paint, I'm going to add some paint additive to the paint that we have, so this way the paint won't fall too thick into the window frames. Okay, let's mix this together. Let's go nice and easy. Okay, back over, ready to paint. I've got this inch-and-a-half painting brush. The trick is, you don't have to dip this brush way into the bucket. All you've got to do is use two fingers, just like that. Okay, this is the one we're going to use for this area here. Remember your fingers. That's it, good, that looked good. All right, where do I start? Always from the top. Start right at the corner and go all the way down. All right, Doc, I don't need to be so fast with the glass. Okay, remember we have masking liquid already dry.
All right, okay, before you paint, I'm going to stick this putty knife right there. This way you don't put any paint on the jamb. Sounds great. Nice. Mm-hmm. Okay, that's work, that's by the knife. Down again, we're starting to look good already. Yeah, a lot brighter. Yeah, okay, now we get into this part. No, don't mean that. Yeah, we're going to push this up, we're going to bring this down. Okay, so we should have a little bit to do here, a little bit to do that, and that's it. What we've got to do first, always, is the inside. Yeah, first. Yeah, this masking liquid is so much better than painter's tape. No, it's better. They put paint on windows and put paint on glass, and you have to scrape. There's a lot of work and a lot of time care. Rebecca, let's get the side of the trim.
Okay, we're going to start by kind of just two and a half brush. Trick is, keep it parallel with the walls, and the brush goes like this. Okay, one long stroke, you go all the way down, and then we paint the face. Okay, right. Waiting for the first coat on the trim to dry, let's work on a chair rail and door casings. Now you're going to decide your cut. You're going to use a two-and-a-half-inch brush again. Okay, okay, start from that corner. Okay, yeah, if you need to move your brush, move it down.
Why didn't we take tape? Because professional painters like me and you don't need tape. Look at that, nice. Cool. I like to call oh, you big. Thank you. It's called stargazer. Great. And we use an eggshell finish for the walls here. Yeah, that'll be nice with the semi-gloss on the trim. It'll be perfect. Okay, the trim is good. I'm coming behind you with a roller. I'm going to roll the walls. Like painting brushes, there's a lot to choose from. What I picked for this project is this nine-inch microfiber roller. Okay, that will give us a nice finish, especially because we're using eggshell.
Since the bottom of the walls and the baseboards are the same color, we're going to use the same finish for the trim. Go. With the second coat, we're going to use eggshell for the walls and semi-gloss finish for the baseboard because it's part of the trim. Okay, I saved the best for last. It's time to remove the masking liquid that we applied early this morning. Okay, like this, take a razor knife and go nice and easy around the sash. Okay, take a look at this. Just lift one end, right? Okay, cool. Oh, that's awesome. It's so clean. Wow, that is really cool. That's amazing. Liquid masking. Well, I've got to say, Rebecca, you picked nice colors for this room. Well, thanks so much for your help. I really appreciate it. Enjoy. Thank you. This is one more thing off the to-do list.