digest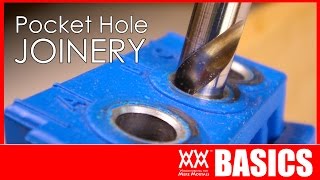
Short Summary
Main recommendation: Use pocket hole joinery, drilling angled holes with a Kreg-style jig and driving special coarse-thread pocket screws, to make strong, beginner-friendly joints without advanced skills. The video explains why screws must bite into face or edge grain rather than end grain, and how to set up the jig, drill, clamp, and drive the screws correctly.
Key Points
- Pocket holes solve the weak connection of screwing into end grain by driving an angled screw through face grain into another board's face or edge grain.
- The special stepped bit creates a flat ledge that the screw's wide, washer-like head seats against, giving a tight, strong joint.
- Pocket hole joinery is presented as low-cost and skill-light, suited to project-focused beginners who want quick results, which he contrasts with those focused on fine craftsmanship like dovetails or mortise and tenon.
- Clamping the boards together while driving screws is essential, because the screw's twisting motion otherwise shifts the pieces out of flush.
- Visible holes can be concealed by plugging them with purchased wooden plugs or glued, sanded dowels, which works well on painted projects.
Details Worth Noting
- Concrete instructions:
- Attach the jig to something so it cannot move.
- Adjust the jig's setting to match your board thickness, using the markings and positive stops on the side. The speaker rarely changes this because he mostly drills 3/4-inch boards.
- Set drill depth by loosening the collar with a hex wrench, dropping the bit into a guide hole, letting it touch the plastic base, backing it off slightly, then locking the collar so the bit does not drill into the base.
- Choose one of the three guide holes to space pocket holes as you like, set the board, lock it down, and drill at the drill's highest speed until the collar stops the bit.
- Drill along the ends of boards usually; drill along an edge only when joining boards that way, remembering the screw point must still enter edge or face grain.
- Choose screw length from the chart on the package, aiming for the longest screw that does not poke through. Run test joints on scrap first.
- He personally uses 1-1/4 inch coarse-thread screws most of the time since he mostly works with 3/4-inch lumber, reserving fine-thread screws for hardwoods like oak or maple, and keeps 1-1/4 inch coarse-thread screws on hand.
- For flat edge joints such as picture frames or cabinet face frames, clamp across the joint. Drive square-drive screws with a long driver at slow drill speed, stopping when you feel the screw tighten.
- To avoid driving screws too deep, set the drill's clutch to a low number. The speaker advises against impact drivers because they can blast screws through the wood.
- For 90-degree joints such as bookcases or boxes, use a bar clamp, pipe clamp, or a specialty corner clamp. Angle screws toward the main body of the board, never toward the end, since there is not enough wood there to hold.
- Use a shop vacuum attachment on the drill, since the speaker says it removes almost all of the mess.
- Pocket holes are usually hidden on the back or underside, but plugs or dowels can fill visible ones.
- The speaker contrasts this with heirloom techniques such as hand-cut dovetails and mortise and tenon, which can take months.
Bottom Line
Pocket hole joinery is an accessible, strong joining method for beginners who want to finish practical projects quickly, provided the holes are drilled correctly and the joints are clamped while the screws are driven.