digest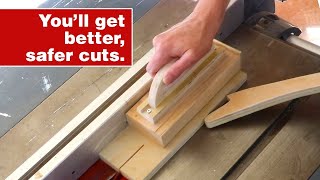
Short Summary
Main recommendation: Build and always use a push block, a large wooden jig with a handle and a replaceable cleat, for long rip cuts on a table saw, paired with a push stick for narrow cuts. The push block keeps the board pressed against the table and the rip fence, which is safer than relying on push sticks alone and produces better cuts. The build is simple and can be adapted with a few material alternatives.
Key Points
- A push block applies three directions of pressure: down onto the table, forward through the cleat, and toward the rip fence (the last supplied by a push stick on narrow cuts).
- The large surface keeps your hands well away from the blade, since there is substantial material between your fingers and the blade.
- For narrow strips, a push stick holds the workpiece against the fence, because the cutoff side is too close to the blade for your fingers.
- The cleat is designed to be cut into during use; when it wears down, flip it or replace it with a spare.
- The design is intentionally simple so more people can build and start using it.
Details Worth Noting
- Concrete instructions:
- Make a push stick first, since you need one to build the push block. Print the cutting template in two pieces, align the targets, tape them together, and hold it against a window to check alignment. Attach it to a scrap of 3/4-inch plywood (the speaker clamped the board to his workbench rather than using spray adhesive), cut it out with a jigsaw, peel off the template, and sand to a comfortable grip.
- Handle channel: raise the saw blade to half the thickness of 3/4-inch plywood. Use an oversized scrap for safety. Set the rip fence 3/8 inch from the blade and make the first cut, then move the fence over slightly after each pass, checking the fit against a piece of plywood until close. Set the final width and raise the blade back up.
- Use a push stick on narrow cuts against the rip fence to keep the workpiece fully supported through the cut, so it does not bind or fail to clear the blade.
- Handle: cut the bottom section square on the miter gauge so the edge can register on the plywood's straight edge. Cut the center with a jigsaw after drilling a starter hole. Shape and sand, but do not sand the factory edge, which fits into the channel. Drill the screw holes before gluing the handle in, then glue and clamp.
- Base: use a 2x4 cut to about 9 inches long (he noted this is his preferred length and it could be longer), with the handle centered (though some suggested tipping the handle to one side, which he said is also fine). Attach with 1-inch screws and washers.
- Cleats: make from 1/4-inch plywood, slightly wider than the 2x4 thickness, with about a 1/4-inch overhang. Set the width using a block rather than the rip fence to avoid kickback. Drill two holes in each and attach with 1-inch screws.
- Setup for cuts: raise the blade only slightly above the board's thickness. Lock the rip fence, rest the cleat on the back of the board, and keep the push block against the fence.
- Store spare cleats so they can be swapped in when the current one is worn.
- Screw concern: a blade would have to be raised very high to hit the screws. If that worries you, use nylon screws or brass screws, which are softer and less likely to damage a blade.
- Alternative attachments: gluing the cleat to the 2x4 (wood glue or hot glue) is possible, but it will not ride flat on the table saw, so the cleat portion must be cut off first. Sandpaper or drawer liner grip material was suggested, but the speaker advised against it because it could gum up the blade.
- The speaker recommends keeping the design simple rather than adding dovetails or storage compartments, though he notes such complex options work fine if you prefer them.
Bottom Line
A push block is a low-cost, easily built jig that makes long table saw rips safer and cleaner, and he recommends always using one.