digest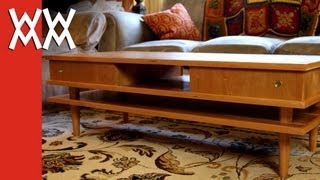
Short Summary
Main recommendation: Build the midcentury modern coffee table by cutting all dados and rabbets into the single 48-inch top/bottom board before splitting it, because pre-cut dados keep the pieces aligned for glue-up. The project is a cherry coffee table with four sliding-door storage cabinets (two per side, about 10 inches deep) and matches a cherry credenza (described as a 50s-style retro TV stand) the presenter made earlier.
Key Points
- Dados (grooves across the board) are strong, simple to cut with a router and straight bit, and help align pieces before gluing.
- Cutting all joinery into the uncut top/bottom board first ensures the two halves line up perfectly when separated.
- Lay out joinery by measuring from the router bit's center to the router base edge (2 and 7/8 inches on this setup) and adding the bit radius.
- A dado and a rabbet are essentially the same cut; a rabbet is simply a dado on the board's edge.
- Leg pieces are cut to length using a table saw sled with a stop block, and the case is flipped to align leg holes.
Details Worth Noting
- Concrete instructions:
- For 3/4-inch plywood, cut dados 3/8 inch deep and set router depth with a depth setup bar (the presenter used a 3/8-inch Craftsman setup bar).
- Measure router base-to-bit distance on your own router; the presenter's was 2 and 7/8 inches, and it will differ for other routers.
- For the outer rabbets, add the router bit radius (3/8 inch) to the base-to-bit distance and line up the cut.
- For the center dado, place it 15 inches from the rabbet edge, so its center is 15 3/8 inches; then add 2 7/8 inches for the router-base offset to mark about 18 1/4 inches. Cut the center dado about 1 inch wide to leave room to separate the two halves.
- Use all measurements from the center line, since the top and bottom are one board until split.
- After cutting joinery, cut both halves to 20 inches, and cut the remaining parts 4 3/4 inches wide.
- Edge band four door pieces with iron-on banding; lacquer interior surfaces while they are still easy to reach.
- Cut two legs from each blank, drill 1/2-inch holes into the legs as straight as possible, and use a table saw sled with a stop block for consistent lengths.
- Before final assembly, scrape lacquer where the legs will attach to the lower shelf, then attach lower trim molding.
- Cover finished surfaces with waxed paper before gluing the final strips and installing doors.
- The presenter notes that exact measurements will differ with your router, so do the math for your setup and stay consistent.
- Leg tapers were not perfectly even, and the presenter says minor imperfections are unlikely to be noticed.
Bottom Line
Cutting all joinery into the uncut board before splitting it is the key method here, and the presenter's specific measurements matter less than measuring your own router and keeping every cut referenced to the same centerline.