digest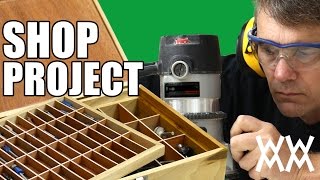
Short Summary
Main recommendation: Build a router bit storage box from scrap lumber, using a grid of slotted dividers in a shallow upper tray and a lidded base to organize router bits. The project is presented as a shop build, with the speaker mixing a dado stack on a tablesaw with a router for the grooves and using a miter sled for the frame.
Key Points
- Scrap hardwoods and plywood are used, including walnut, birch, maple, and poplar, with 1/8-inch plywood for the tray base.
- The lid is cut from the main box, and the lid's slots are cut only on the short ends, not the long sides, because aligning a grid on all four sides was judged too difficult.
- The upper tray frame uses mitered strips without grooves, since cutting grooves seemed like more work than necessary and the grid could just be glued in.
- The lower grid is held mainly by fit, with only a small dab of glue added.
- Old router bit boxes are discarded once the new storage is ready.
Details Worth Noting
Concrete instructions:
- Set the tablesaw blade to a 45 degree angle and cut the side pieces to frame the box.
- Straighten the blade and rip the sides to final widths, following plans for the grooves that join the pieces.
- Cut the grooves with a dado stack on the tablesaw, or with a router if preferred.
- Groove the box so the first set of slots holds the upper tray and base, then cut the top off to become the lid.
- Cut slots only on the short ends of the lid, glue those pieces together, and let them dry before gluing up the top.
- Cut the upper tray frame strips with the miter sled.
- Cut the 1/8-inch plywood base for the tray, using light weight during glue-up so the thin plywood does not sag.
- For the grid, use a backer board and stop block clamped together to cut matching slots in the strips at the same time, then cut two slots in each short divider and make a couple of extras.
- Cut the long dividers with many slots, accepting that they may not be perfectly even.
Additional points:
- The speaker expects the grid to be one of the most tedious steps and recommends careful measurements and taking time.
- The lower grid is expected to stay in place without glue, but glue was added as a precaution.
- The speaker notes the build is for his own shop use, so appearance didn't matter much to him.
Bottom Line
A practical scrap-wood project that organizes router bits with a slotted grid and lidded tray, with the most demanding work in precise groove cutting and grid alignment.