digest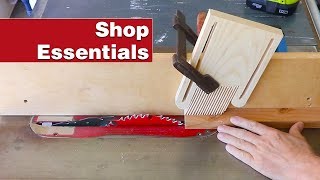
Short Summary
Main recommendation: Build and use a featherboard (a board with flexible, angled teeth) positioned in front of the blade to keep workpieces pressed against the fence and table while cutting on a table saw or router table. Presenter Steve Ramsey frames it as part of his essential woodworking jig series and says homemade featherboards are easy and inexpensive compared with buying them.
Key Points
- A featherboard lets a workpiece slide in only one direction, so it keeps stock pressed against the fence while it passes the blade, useful when you cannot reach the fence or need extra downward support.
- Every cut should have three directions of support: down against the table, forward through the saw, and sideways against the fence, all with fingers clear of the blade.
- Position a table-saw featherboard in front of the blade; placed even with or behind it, it presses on the blade and can pinch the workpiece into an unsafe cut.
- On a router table the featherboard can sit directly in front of the bit, since a router does not cut all the way through the wood.
- Ramsey describes a simple version and an extra fancy, wider-adjustable version as two options.
Details Worth Noting
- Concrete instructions: Use solid lumber, not plywood or sheet goods; pine or other inexpensive softwood is recommended because hardwood is less flexible unless the teeth are cut very thin. Start with two 5-inch by 9-inch blanks (any size works).
- Concrete instructions: Cut a 20-degree angle on one end so one side reaches the blade and the other attaches to the miter slot; the needed length varies by saw, so draw a reference line parallel to the mitered edge to mark where to stop the teeth cuts.
- Concrete instructions: Raise the blade as high as it will go when cutting the teeth so both sides stay at roughly equal depth; make a series of cuts to form the feather side, varying tooth thickness is fine as long as each tooth flexes. Ramsey eyeballs the cuts rather than measuring each one.
- Concrete instructions: Attach to the miter slot using an elevator bolt (one-inch-wide head fits the T-slot), a washer, and a star knob or wing nut (about a dollar each at a hardware store). Alternatives include an expanding bar kit (about $9 for two, per Ramsey) or magnetic hold-downs, which are more expensive. A DIY screw-and-slot expander needs machining and a notch to grip, so Ramsey does not recommend it.
- Concrete instructions: For the fancy version, cut two slots so the featherboard slides and clamps at different positions; an extra fancy template can be spray-adhered to a wider blank, with jigsaw work done before cutting the fingers on the table saw.
- Concrete instructions: For vertical downward pressure when the rip fence is too short, attach a sacrificial fence of plywood with drilled holes and specialty clamps, then screw a wide piece of plywood in place; Ramsey says he will link the clamps in the description.
- Caveat: The simple version clamped at the far end is less stable than one clamped close to the blade, which is why the miter slot is preferred.
Bottom Line
Making your own featherboard for under a few dollars in scrap pine and hardware gives consistent, safer cuts, as long as it sits in front of the blade on a table saw.